There’re many misconceptions about how to properly use a back brace.
Workers have questions such as: Should you use it really tight or loose? Should you use it in the lower, middle, or upper back? Should you criss-crooss the straps? And on and on…
These many questions gave me the willpower to create this article which will help you understand in 5 easy steps how you should use any type of back brace that you might have bought or that you’re interested in buying.
Attention: This is not medical advice. I’m just telling from my personal experience what I consider the best way to use a back brace. You should consult a doctor if you’re planning on wearing a back brace for work.
How to Use a Back Brace In 5 Easy Steps
Here’s a step by step guide I personally use to make sure my back brace fits perfectly:
- Step 1: Get Well Cover
- Step 2: Don’t Suck Your Stomach
- Step 3: Wrap It Well
- Step 4: Don’t Make it Too Tight
- Step 5: Enjoy
Step 1: Get Well Cover
When I talk about ensuring the brace covers your back and tailbone, I mean you should be looking for a brace that’s anatomically designed for your body type.
I’ve tried one-size-fits-all braces, and they’re usually a disaster.
For me, the ideal brace should have adjustable straps and enough length to cover from my lower back to my tailbone.
I’ve found that braces with lumbar pads offer that extra bit of support that can be a lifesaver during a long workday.
So… don’t just settle for coverage; aim for comprehensive support.
Step 2: Don’t Suck Your Stomach!
The urge to suck in your stomach is almost instinctual, especially when you’re trying to fit into something.
But here’s the thing: doing so alters your spinal alignment.
I learned this the hard way when I ended up with a brace that felt like a straightjacket after a few hours.
Your muscles and spine have a natural curvature, and the brace should support that, not work against it.
So, when I’m putting on the brace, I always stand as I naturally would. Think of it as capturing a snapshot of your natural posture—that’s what you want to support.
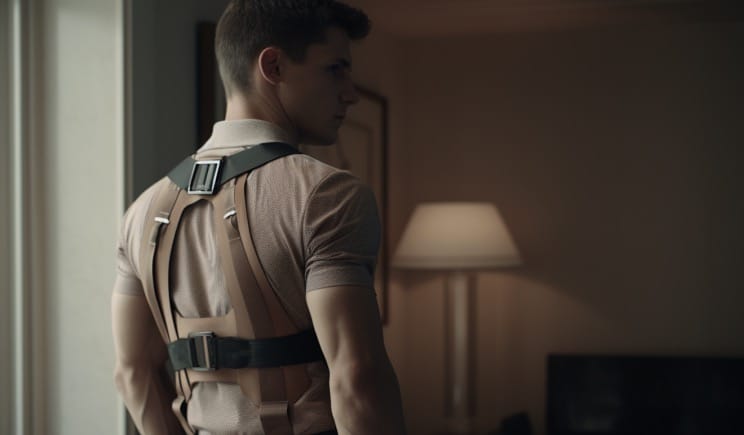
Step 3: Wrap It Well
I used to think that crisscrossing them would distribute the pressure more evenly.
Boy, was I wrong!
Not only did it make the brace loosen up, but it also created pressure points that became increasingly uncomfortable as the day went on.
The key is to align the straps so they run parallel to my spine. This ensures that the pressure is evenly distributed, providing consistent support without any of the annoying readjustments.
And remember, the straps should be snug but not constricting. You want to avoid the “boa constrictor” effect at all costs.
Step 4: Don’t Make It Too Tight
Tightening the brace too much is a common mistake, and it’s one I’ve made more times than I care to admit.
When you overtighten, you’re actually restricting your muscles and limiting your range of motion. This can lead to muscle fatigue and even more back problems down the line.
A good rule of thumb is the “two-finger test.” If I can slide two fingers between the brace and my body comfortably, you’re in the clear.
Any tighter, and you’re venturing into discomfort territory.
Step 5: Enjoy—But Don’t Forget the Clothes
Once you’ve got the brace on correctly, it’s like a breath of fresh air—your back feels supported, your posture improves, and you can go about your day with one less thing to worry about.
But before you step out, do a “clothing check.” I’ve had braces that were so bulky, they made me look like I was wearing a bulletproof vest under my shirt.
So, try on a few different types of clothing over the brace. Make sure it’s discreet enough to wear under a T-shirt but also comfortable enough under a dress shirt or a suit if you’re heading to a more formal setting.
Frequently Asked Questions
Again, this is not medical advice, to make sure you are doing things right, you should consult a doctor.
How many hours a day should you wear a back brace?
There’s no one-size-fits-all answer here, but I can share what’s worked for me. Generally, I wouldn’t want to be wearing a back brace all day long as doing so could actually weaken my muscles. I usually wear my back brace 2-3 hours and then gradually increasing the time as I get used to it. But I always listen to my body—if I start to feel discomfort, it’s time to take a break.
When should you start using a back brace?
If you’ve recently suffered a back injury or you’re dealing with chronic back pain, a back brace can be a godsend. But—and this is a big but—always consult with a healthcare professional first. I made the mistake of self-diagnosing and using a back brace without proper guidance, and let’s just say it didn’t end well. So, get a proper diagnosis and then proceed with caution.
Do you wear a back brace under or over clothes?
Personally, I prefer wearing it under my clothes. It’s more discreet and tends to stay in place better. But there are some braces designed to be worn over clothing, especially if you’re doing heavy lifting or manual labor.
What are the disadvantages of wearing a back brace?
For one, I don’t like the fact that they can make my muscles lazy if I wear them too much. I’ve also found that improper use can lead to more pain and even misalignment. And let’s not forget the potential for skin irritation if you’re wearing it for extended periods.
How should I lay with lower back pain?
For me, laying on my back with a pillow under my knees works wonders. It helps maintain the natural curve of the spine.