
I know what you’re thinking: “why wouldn’t you just use an impact wrench to remove a flywheel nut?”
Well, using an impact wrench to remove a flywheel nut might not always be your best bet. Shocking, I know. In fact, I have to tell you that sometimes impact wrenches can cause more harm than good.
This is why, in this article, we’re going to explore alternative methods, tools, and some sweet tips to remove that pesky flywheel nut without an impact wrench.
Let’s begin.
Why You Might Not Want to Use an Impact Wrench to Remove a Flywheel Nut
You might think that using an impact wrench for removing a flywheel nut is the way to go, as it provides rapid action and raw power which can make short work of stubborn nuts.
But, there are many reasons why you should consider avoiding using an impact wrench to remove a flywheel nut, such as:
- Potential Damage: Using an impact wrench can lead to over-torquing. This, in turn, might damage the flywheel or its threads which is annoying as hell as you’ll have to spend more time and money fixing the damage
- Lack of Control: The high torque provided by impact wrenches can make it difficult to control the tool, possibly leading to slips and accidents, especially if you aren’t that experienced with high torque tools
- Cost: Not everyone has an impact wrench lying around, and investing in one might not be cost-effective if you’re only using it once or twice. I mean, who wants to spend a fortune on a tool that’s going to collect dust in the garage?
Now, you might be wondering, how you can remove a flywheel nut without an impact wrench? Well, that’s exactly what we’ll discuss in this article.
Yet, in summary, you can use tools like breaker bars, large wrenches, and flywheel holders, along with a bit of patience and elbow grease to get the job done.
Tools You Will Need to Remove Flywheel Nut Without Impact Wrench
So you’ve decided to leave the impact wrench on the sidelines and tackle this flywheel nut removal with a more delicate approach, so you can avoid all the risks I told you about.
Good for you!
But before, let’s make sure you’ve got all the tools you’ll need to remove the flywheel nut without an impact wrench:
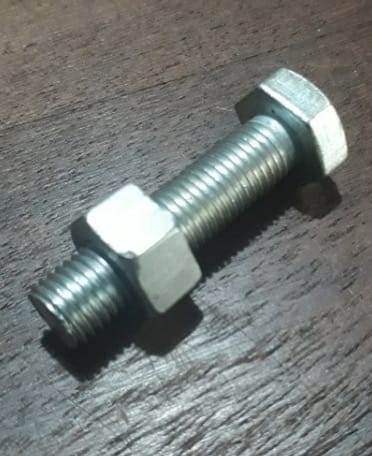
- Breaker Bar: This bad boy is like the older, wiser cousin of your standard ratchet wrench. It’s longer and tougher, built to handle the extra torque needed to break loose stubborn fasteners
- Flywheel Holder: To prevent the flywheel from rotating while you’re working, you’ll need a flywheel holder as it works by gripping the flywheel, keeping it in place and making your life a whole lot easier
- Penetrating Oil: Sometimes, rust and grime can make removing a flywheel nut a real headache. A bit of penetrating oil can work wonders to loosen things up and make the job less of a struggle.
- Safety Gear: Last but definitely not least, grab your safety glasses and gloves. You’re going to war with that flywheel nut, and you want to be well protected.
Now that you’ve got all the tools you need, it’s time to roll up your sleeves and get to work!
Steps to Removing a Flywheel Nut Without an Impact Wrench
Alright, you’ve got your tools, and you’re ready to conquer this flywheel nut without the help of an impact wrench.
Let’s walk through the steps together, one by one:
- Safety First: Put on your safety glasses and gloves, because things might get a little messy and you want to protect hands and eyes of yours.
- Secure the Flywheel: Grab your flywheel holder and secure the flywheel to prevent it from rotating while you’re working. If you’ve never used one of these tools before, don’t worry – they’re pretty intuitive and easy to figure out.
- Apply Penetrating Oil: If your flywheel nut is looking a little rusty or crusty, it’s time to break out the penetrating oil. Give the nut a good spray and let it sit for a few minutes to work its magic.
- Attach the Breaker Bar and Socket: Place the socket or wrench onto the flywheel nut, ensuring it’s snug and secure. Then, attach your breaker bar to the socket or wrench.
- Break the Nut Loose: With the breaker bar attached, apply steady pressure to loosen the flywheel nut. Remember, slow and steady wins the race here – you don’t want to damage anything by applying too much force too quickly. It might take a little elbow grease, but eventually, that stubborn nut will give in.
- Remove the Nut: Once the flywheel nut is loose, remove the breaker bar and continue to unscrew the nut by hand or with a regular ratchet wrench.
Now, if you’re feeling adventurous and want to speed things up a bit, you could use a propane torch to heat the nut as this will cause it to expand, making it easier to break free.
Just be careful with the open flame, and make sure you don’t apply too much heat to any nearby components.
As we’ve shown, with the right tools and a bit of patience, you can successfully tackle this task without the need for an impact wrench. But let’s be honest – if you have access to one, it’ll make your life a whole lot easier!
Tips and Tricks for Removing a Flywheel Nut Without an Impact Wrench
The quest to remove a flywheel nut without an impact wrench… It’s a serious challenge, but fear not as I will give you some top-notch tips and tricks to make this substantially easier.
Let’s get right into it:
- Use Penetrating Oil: When using penetrating oil, don’t be impatient. Let it do its job and give it ample time to penetrate and loosen the rust or corrosion. Sometimes, you might need to let it sit for a few hours or even overnight to get the best results.
- Bigger Is Better: When choosing a breaker bar, opt for one with a longer handle. The extra length will give you more leverage, making it easier to apply the necessary force to break the nut free.
- Mind Your Technique: When applying force to the breaker bar, make sure to push or pull in a controlled, steady manner. Sudden jerks or excessive force can lead to slips, injuries, or damage to the flywheel or nut.
- Double Check: Before you start wrenching away, double-check the direction you need to turn the nut. Most flywheel nuts have a standard right-hand thread, which means you’ll need to turn it counterclockwise to loosen. But, there are always exceptions.
Now, let’s talk about using heat to make the process easier. Applying heat with a propane torch to the nut can help expand the metal, making it easier to break free.
A good old-fashioned hammer can also be a useful tool in this process. A few gentle taps on the wrench or breaker bar can help create the necessary shock to break the nut loose. Just make sure not to go overboard and damage anything.
Frequently Asked Questions
What’s a flywheel nut?
The flywheel nut is a crucial component that secures the flywheel to a variety of engines or machinery, like those found in cars, motorcycles, and even lawn mowers.
The nut is typically made of sturdy materials, like steel, and is designed to withstand the constant stress and torque placed upon it.